Render Word documents as HTML, PDF, and image files Leave feedback
On this page
GroupDocs.Viewer for .NET allows you to render your Microsoft Word documents in HTML, PDF, PNG, and JPEG formats. You do not need to use Microsoft Word or other word processors to load and view Word documents within your .NET application (web or desktop).
To start using the GroupDocs.Viewer API, create a Viewer class instance. Pass a document you want to view to the class constructor. You can load the document from a file or stream. Call one of the Viewer.View method overloads to convert the document to HTML, PDF, or image format. These methods allow you to render the entire document or specific pages.
GroupDocs.Viewer supports the following Word Processing file formats:
- Microsoft Word Document (.DOCX)
- Microsoft Word 97-2003 Document (.DOC)
- Microsoft Word Macro-Enabled Document (.DOCM)
- Microsoft Word 97-2003 Template (.DOT)
- Microsoft Word Macro-Enabled Template (.DOTM)
- Microsoft Word Template (.DOTX)
- OpenDocument Text (.ODT)
- OpenDocument Text Template (.OTT)
- Rich Text Document (.RTF)
- Plain Text Document (.TXT)
GroupDocs.Viewer can detect the document format automatically based on information in the file header.
Create an HtmlViewOptions class instance and pass it to the Viewer.View method to convert a Word file to HTML. The HtmlViewOptions class properties allow you to control the conversion process. For instance, you can embed all external resources in the generated HTML file, minify the output file, and optimize it for printing. Refer to the following documentation section for details: Rendering to HTML.
To save all elements of an HTML page (including text, graphics, and stylesheets) into a single file, call the HtmlViewOptions.ForEmbeddedResources method and specify the output file name.
using GroupDocs.Viewer;
using GroupDocs.Viewer.Options;
// ...

using (var viewer = new Viewer("resume.docx"))
{
    // Create an HTML file for each document page.
    // {0} is replaced with the current page number in the file name.
    var viewOptions = HtmlViewOptions.ForEmbeddedResources("page_{0}.html");
    viewer.View(viewOptions);
}
Imports GroupDocs.Viewer
Imports GroupDocs.Viewer.Options
' ...

Module Program
    Sub Main(args As String())
        Using viewer = New Viewer("resume.docx")
            ' Create an HTML file for each document page.
            ' {0} is replaced with the current page number in the file name.
            Dim viewOptions = HtmlViewOptions.ForEmbeddedResources("page_{0}.html")
            viewer.View(viewOptions)
        End Using
    End Sub
End Module
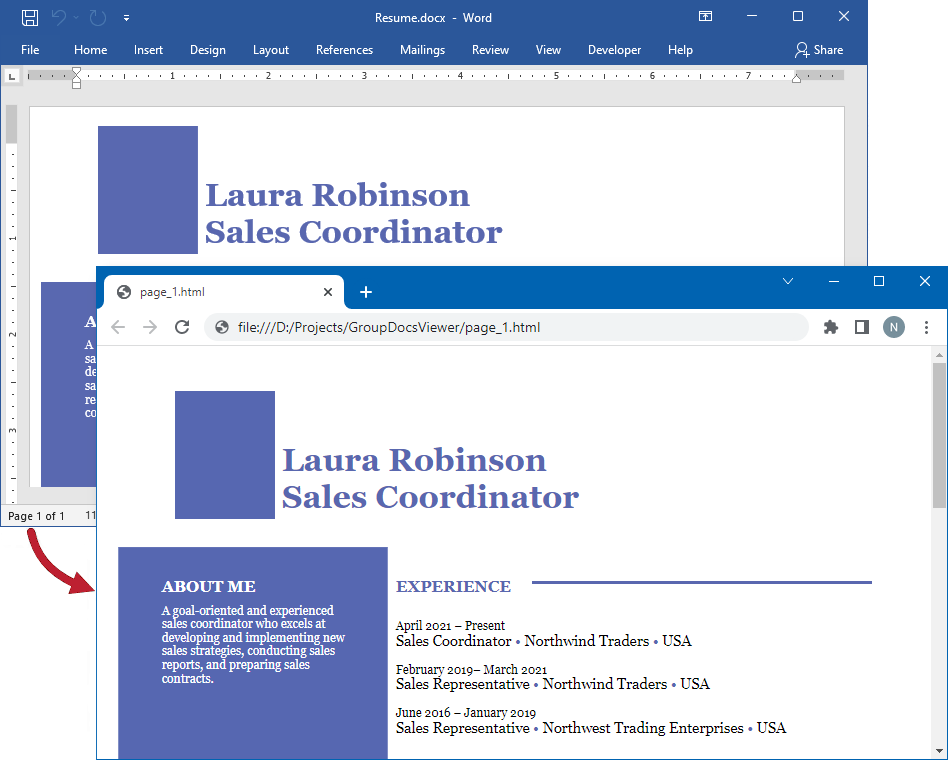
The following image demonstrates the result:
If you want to store an HTML file and additional resource files (such as fonts, images, and stylesheets) separately, call the HtmlViewOptions.ForExternalResources method and pass the following parameters:
- The output file path format
- The path format for the folder with external resources
- The resource URL format
using GroupDocs.Viewer;
using GroupDocs.Viewer.Options;
// ...

using (var viewer = new Viewer("resume.docx"))
{
    // Create an HTML file for each document page.
    // Specify the HTML file names and location of external resources.
    // {0} and {1} are replaced with the current page number and resource name, respectively.
    var viewOptions = HtmlViewOptions.ForExternalResources("page_{0}.html", "page_{0}/resource_{0}_{1}", "page_{0}/resource_{0}_{1}");
    viewer.View(viewOptions);
}
Imports GroupDocs.Viewer
Imports GroupDocs.Viewer.Options
' ...

Module Program
    Sub Main(args As String())
        Using viewer = New Viewer("resume.docx")
            ' Create an HTML file for each document page.
            ' Specify the HTML file names and location of external resources.
            ' {0} and {1} are replaced with the current page number and resource name, respectively.
            Dim viewOptions = HtmlViewOptions.ForExternalResources("page_{0}.html", "page_{0}/resource_{0}_{1}", "page_{0}/resource_{0}_{1}")
            viewer.View(viewOptions)
        End Using
    End Sub
End Module
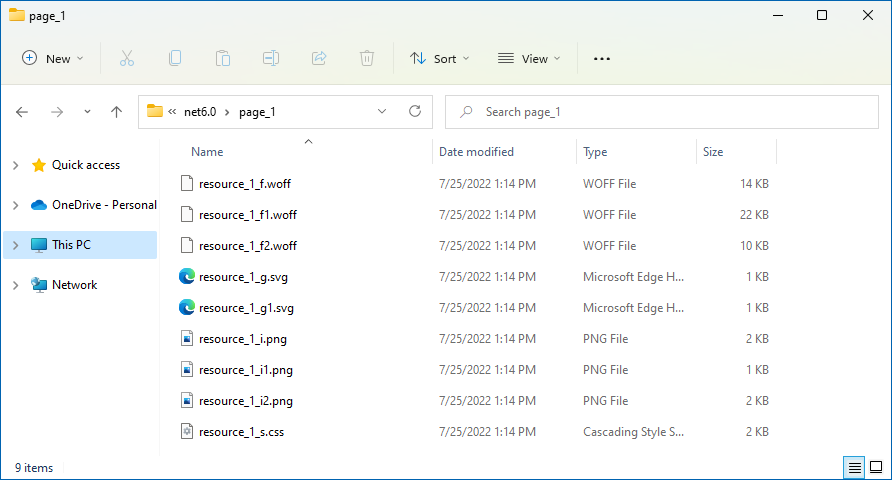
The image below demonstrates the result. External resources are placed in a separate folder.
Create a PdfViewOptions class instance and pass it to the Viewer.View method to convert a Word file to PDF. The PdfViewOptions class properties allow you to control the conversion process. For instance, you can protect the output PDF file, reorder its pages, and specify the quality of document images. Refer to the following documentation section for details: Rendering to PDF.
using GroupDocs.Viewer;
using GroupDocs.Viewer.Options;
// ...

using (var viewer = new Viewer("resume.docx"))
{
    // Create a PDF file for the document.
    // Specify the PDF file name.
    var viewOptions = new PdfViewOptions("output.pdf");
    viewer.View(viewOptions);
}
Imports GroupDocs.Viewer
Imports GroupDocs.Viewer.Options
' ...

Module Program
    Sub Main(args As String())
        Using viewer = New Viewer("resume.docx")
            ' Create a PDF file for the document.
            ' Specify the PDF file name.
            Dim viewOptions = New PdfViewOptions("output.pdf")
            viewer.View(viewOptions)
        End Using
    End Sub
End Module
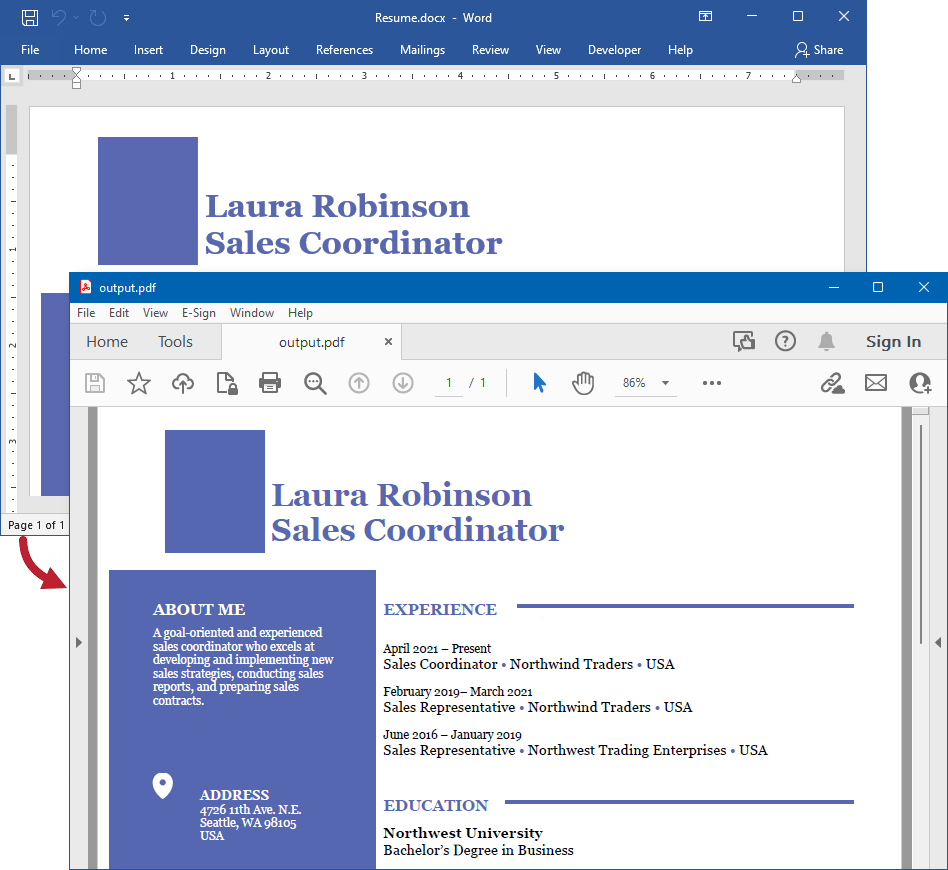
The following image demonstrates the result:
Create a PngViewOptions class instance and pass it to the Viewer.View method to convert a Word file to PNG. Use the PngViewOptions.Height and PngViewOptions.Width properties to specify the output image size in pixels.
using GroupDocs.Viewer;
using GroupDocs.Viewer.Options;
// ...

using (var viewer = new Viewer("resume.docx"))
{
    // Create a PNG image for each document page.
    // {0} is replaced with the current page number in the image name.
    var viewOptions = new PngViewOptions("output_{0}.png");
    // Set width and height.
    viewOptions.Width = 800;
    viewOptions.Height = 900;
    viewer.View(viewOptions);
}
Imports GroupDocs.Viewer
Imports GroupDocs.Viewer.Options
' ...

Module Program
    Sub Main(args As String())
        Using viewer = New Viewer("resume.docx")
            ' Create a PNG image for each document page.
            ' {0} is replaced with the current page number in the image name.
            Dim viewOptions = New PngViewOptions("output_{0}.png")
            ' Set width and height.
            viewOptions.Width = 800
            viewOptions.Height = 900
            viewer.View(viewOptions)
        End Using
    End Sub
End Module

Create a JpgViewOptions class instance and pass it to the Viewer.View method to convert a Word file to JPEG. Use the JpgViewOptions.Height and JpgViewOptions.Width properties to specify the output image size in pixels.
using GroupDocs.Viewer;
using GroupDocs.Viewer.Options;
// ...

using (var viewer = new Viewer("resume.docx"))
{
    // Create a JPEG image for each document page.
    // {0} is replaced with the current page number in the image name.
    var viewOptions = new JpgViewOptions("output_{0}.jpg");
    // Set width and height.
    viewOptions.Width = 800;
    viewOptions.Height = 900;
    viewer.View(viewOptions);
}
Imports GroupDocs.Viewer
Imports GroupDocs.Viewer.Options
' ...

Module Program
    Sub Main(args As String())
        Using viewer = New Viewer("resume.docx")
            ' Create a JPEG image for each document page.
            ' {0} is replaced with the current page number in the image name.
            Dim viewOptions = New JpgViewOptions("output_{0}.jpg")
            ' Set width and height.
            viewOptions.Width = 800
            viewOptions.Height = 900
            viewer.View(viewOptions)
        End Using
    End Sub
End Module
Use the following properties to specify the size of page margins in the output files when you convert your Word documents to HTML, PDF, and image formats:
- WordProcessingOptions.TopMargin specifies the distance (in points) between document content and the top edge of the page.
- WordProcessingOptions.BottomMargin specifies the distance (in points) between document content and the bottom edge of the page.
- WordProcessingOptions.LeftMargin specifies the distance (in points) between document content and the left edge of the page.
- WordProcessingOptions.RightMargin specifies the distance (in points) between document content and the right edge of the page.
You can access these properties for the following classes:
The example below converts a Word document to HTML and specifies page margins for the output file.
using GroupDocs.Viewer;
using GroupDocs.Viewer.Options;
// ...

using (var viewer = new Viewer("resume.docx"))
{
    // Create an HTML file for each document page.
    // {0} is replaced with the current page number in the file name.
    var viewOptions = HtmlViewOptions.ForEmbeddedResources("page_{0}.html");
    // Specify the size of page margins in points.
    viewOptions.WordProcessingOptions.TopMargin = 72;
    viewOptions.WordProcessingOptions.BottomMargin = 72;
    viewOptions.WordProcessingOptions.LeftMargin = 54;
    viewOptions.WordProcessingOptions.RightMargin = 54;
    viewer.View(viewOptions);
}
Imports GroupDocs.Viewer
Imports GroupDocs.Viewer.Options
' ...

Module Program
    Sub Main(args As String())
        Using viewer = New Viewer("resume.docx")
            ' Create an HTML file for each document page.
            ' {0} is replaced with the current page number in the file name.
            Dim viewOptions = HtmlViewOptions.ForEmbeddedResources("page_{0}.html")
            ' Specify the size of page margins in points.
            viewOptions.WordProcessingOptions.TopMargin = 72
            viewOptions.WordProcessingOptions.BottomMargin = 72
            viewOptions.WordProcessingOptions.LeftMargin = 54
            viewOptions.WordProcessingOptions.RightMargin = 54
            viewer.View(viewOptions)
        End Using
    End Sub
End Module
GroupDocs.Viewer does not render tracked changes (revisions made to a Word document) by default. If you want to display tracked changes in the output file, enable the WordProcessingOptions.RenderTrackedChanges property for one of the following classes (depending on the output file format):
The following code example demonstrates how to render a Word document with tracked changes:
using GroupDocs.Viewer;
using GroupDocs.Viewer.Options;
// ...

using (var viewer = new Viewer("TrackChanges.docx"))
{
    // Convert the document to PDF.
    var viewOptions = new PdfViewOptions("output.pdf");
    // Enable tracked changes rendering.
    viewOptions.WordProcessingOptions.RenderTrackedChanges = true;
    viewer.View(viewOptions);
}
Imports GroupDocs.Viewer
Imports GroupDocs.Viewer.Options
' ...

Module Program
    Sub Main(args As String())
        Using viewer = New Viewer("TrackChanges.docx")
            ' Convert the document to PDF.
            Dim viewOptions = New PdfViewOptions("output.pdf")
            ' Enable tracked changes rendering.
            viewOptions.WordProcessingOptions.RenderTrackedChanges = True
            viewer.View(viewOptions)
        End Using
    End Sub
End Module
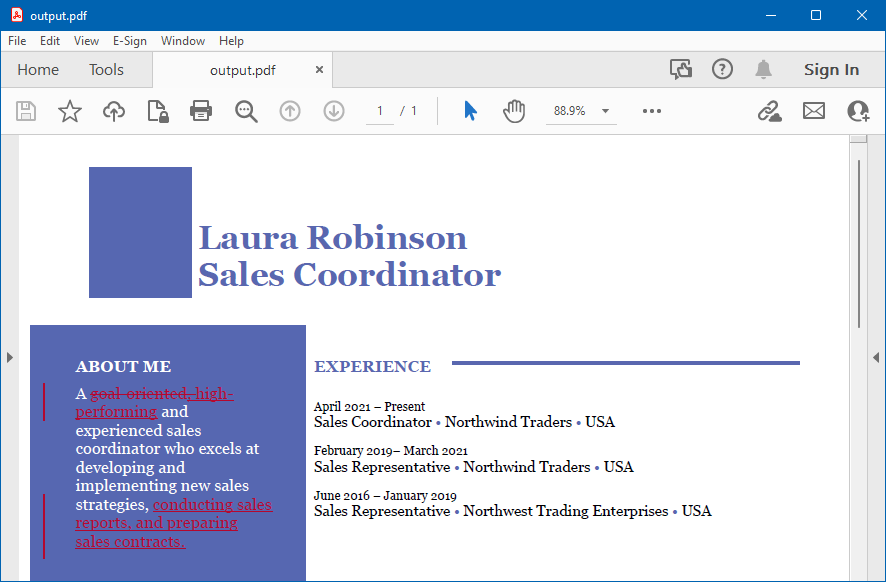
The following image illustrates the result:
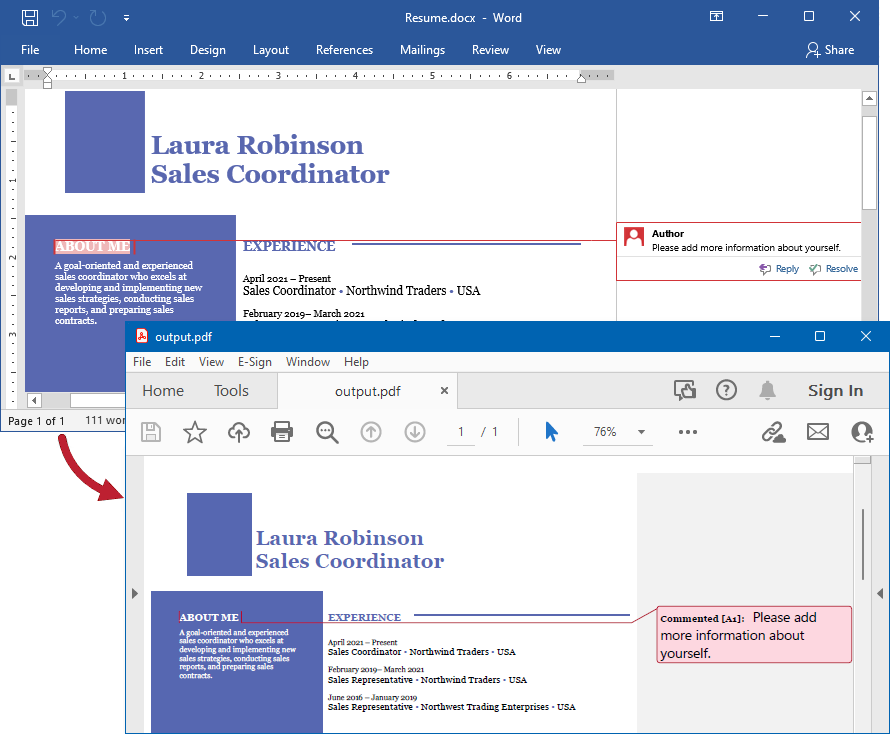
Enable the ViewOptions.RenderComments option for a target view to display comments in the output file when you convert your document to HTML, PDF, PNG, or JPEG format.
The code example below renders a Word document with comments to PDF.
using GroupDocs.Viewer;
using GroupDocs.Viewer.Options;
// ...

using (var viewer = new Viewer("resume.docx"))
{
    // Convert the document to PDF.
    var viewOptions = new PdfViewOptions("output.pdf");
    // Enable comments rendering.
    viewOptions.RenderComments = true;
    viewer.View(viewOptions);
}
Imports GroupDocs.Viewer
Imports GroupDocs.Viewer.Options
' ...

Module Program
    Sub Main(args As String())
        Using viewer = New Viewer("resume.docx")
            ' Convert the document to PDF.
            Dim viewOptions = New PdfViewOptions("output.pdf")
            ' Enable comments rendering.
            viewOptions.RenderComments = True
            viewer.View(viewOptions)
        End Using
    End Sub
End Module
The following image illustrates the result:
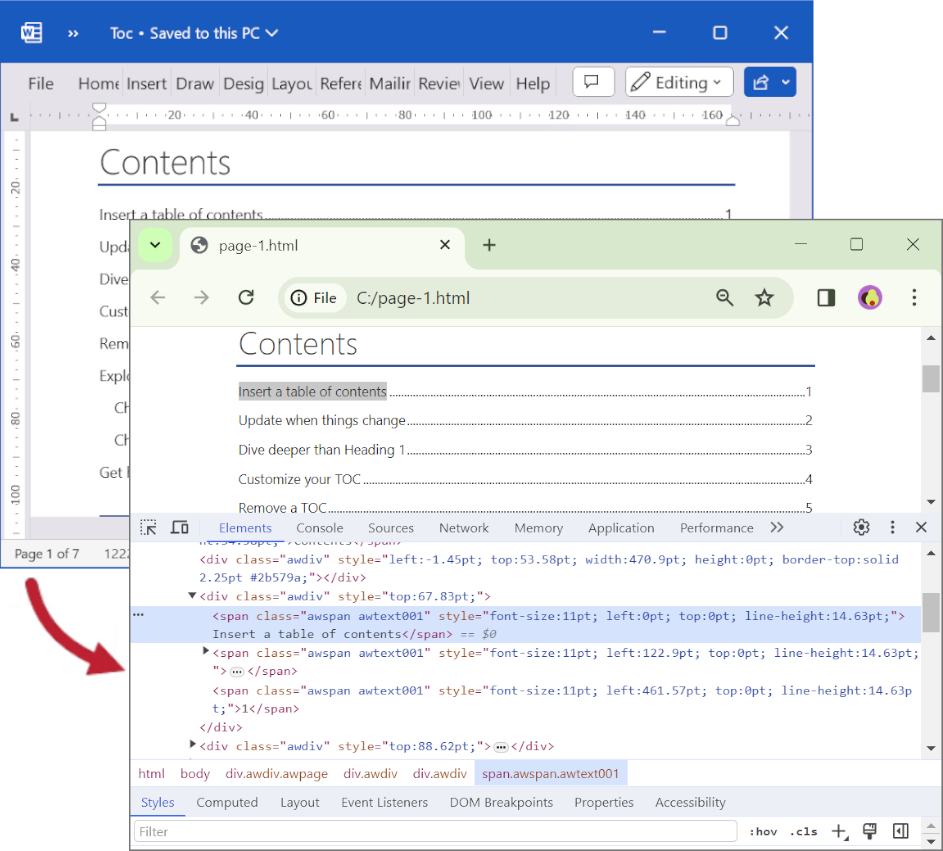
When rendering to HTML or PDF, you can set WordProcessingOptions.UnlinkTableOfContents to true to unlink table of contents. For HTML rendering, <a> tags with relative links will be replaced with <span> tags, removing functionality but preserving visual appearance. For PDF rendering, the table of contents will be rendered as plain text without links to document sections.
The code example below renders a Word document with table of contents as a plain text without links.
using GroupDocs.Viewer;
using GroupDocs.Viewer.Options;
// ...

using (var viewer = new Viewer("resume.docx"))
{
    // Convert the document to HTML.
    var viewOptions = HtmlViewOptions.ForEmbeddedResources();
    // Unlink table of contents.
    viewOptions.WordProcessingOptions.UnlinkTableOfContents = true;
    viewer.View(viewOptions);
}
Imports GroupDocs.Viewer
Imports GroupDocs.Viewer.Options
' ...

Module Program
    Sub Main(args As String())
        Using viewer = New Viewer("resume.docx")
            ' Convert the document to HTML.
            Dim viewOptions = HtmlViewOptions.ForEmbeddedResources()
            ' Unlink table of contents.
            viewOptions.WordProcessingOptions.UnlinkTableOfContents = True
            viewer.View(viewOptions)
        End Using
    End Sub
End Module
The following image illustrates the result:
The most of formats inside the WordProcessing family of formats, like DOC, DOCX, ODT and so on, have the concept of fields, which are processed when the document is opened in some viewer application like Microsoft Word. When the input WordProcessing document is loaded to the GroupDocs.Viewer and saved to the HTML (with embedded or external resources), PDF, PNG, or JPEG output formats, all the fields within the input document are updated while saving, and this mimics the Microsoft Word behavior. But in some scenarios, for example, when field values are incorrect, there is no necessary and even not desirable to update fields.
Starting from the version 24.12 the GroupDocs.Viewer for .NET has obtained an ability to disable updating fields while saving the documents. The new public property UpdateFields of the System.Boolean type was added to the Options.WordProcessingOptions class. By default the value of this property is set to true, so fields are updated, as before. In order to turn fields updating off, please set this property to false. Code sample below shows opening a sample DOCX document and saving to the HTML with embedded resources and PDF formats without updating fields during saving.
using GroupDocs.Viewer;
using GroupDocs.Viewer.Options;
// ...

HtmlViewOptions htmlViewOptions = HtmlViewOptions.ForEmbeddedResources();
htmlViewOptions.WordProcessingOptions.UpdateFields = false;

PdfViewOptions pdfViewOptions = new PdfViewOptions("output.pdf");
pdfViewOptions.WordProcessingOptions.UpdateFields = false;

using (var viewer = new Viewer("resume.docx"))
{
    viewer.View(htmlViewOptions);
	viewer.View(pdfViewOptions);
}
Imports GroupDocs.Viewer
Imports GroupDocs.Viewer.Options
' ...

Dim htmlViewOptions = HtmlViewOptions.ForEmbeddedResources()
htmlViewOptions.WordProcessingOptions.UpdateFields = False

Dim pdfViewOptions = New PdfViewOptions("output.pdf")
pdfViewOptions.WordProcessingOptions.UpdateFields = False

Using viewer = New Viewer("resume.docx")
	viewer.View(htmlViewOptions)
	viewer.View(pdfViewOptions)
End Using
Most of WordProcessing formats like DOC, DOCX, ODT and so on are able to store the scripts, usually written on VBA. When the output format is PDF, PNG, or JPEG, there is no problem at all. But when the output format is HTML, this may lead to the situations when malicious or harmful VBA script(s) from input DOCX, for example, will be translated to the resultant HTML document. Before the version 25.1 the was no possibility for the GroupDocs.Viewer to disable scripts preserving and translation — all the VBA scripts were translated to the JavaScript in HTML. Starting from the version 25.1, for the security purposes script translation is disabled by default — all the links containing JavaScript are replaced with the harmless "javascript:void(0)" string in the resultant HTML markup. But it is possible to enable script translation, as it was present in the GroupDocs.Viewer before, by using a new public property RemoveJavaScript of the System.Boolean type in the Options.HtmlViewOptions class. By default this property has a true value — JavaScript will be removed from the resultant HTML document. For preserving the JavaScript, as it was in the previous versions of the GroupDocs.Viewer, the false value should be assigned to this property. Code sample below shows opening a sample DOCX document and rendering it to the HTML with embedded resources with and without JavaScript.
using GroupDocs.Viewer;
using GroupDocs.Viewer.Options;
// ...

HtmlViewOptions htmlViewOptionsWithoutJavaScript = HtmlViewOptions.ForEmbeddedResources("without-js-page{0}.html");

HtmlViewOptions htmlViewOptionsWithJavaScript = HtmlViewOptions.ForEmbeddedResources("with-js-page{0}.html");
htmlViewOptionsWithJavaScript.RemoveJavaScript = false;

using (var viewer = new Viewer("Doc-with-VBA.docx"))
{
    viewer.View(htmlViewOptionsWithoutJavaScript);
    viewer.View(htmlViewOptionsWithJavaScript);
}
Imports GroupDocs.Viewer
Imports GroupDocs.Viewer.Options
' ...

Dim htmlViewOptionsWithoutJavaScript = HtmlViewOptions.ForEmbeddedResources("without-js-page{0}.html")

Dim htmlViewOptionsWithJavaScript = HtmlViewOptions.ForEmbeddedResources("with-js-page{0}.html")
htmlViewOptionsWithJavaScript.RemoveJavaScript = false;

Using viewer = New Viewer("Doc-with-VBA.docx")
	viewer.View(htmlViewOptionsWithoutJavaScript)
	viewer.View(htmlViewOptionsWithJavaScript)
End Using
Was this page helpful?
Any additional feedback you'd like to share with us?
Please tell us how we can improve this page.
Thank you for your feedback!
We value your opinion. Your feedback will help us improve our documentation.

