Render Project documents as HTML, PDF, and image files Leave feedback
On this page
GroupDocs.Viewer for .NET allows you to render Project files in HTML, PDF, PNG, and JPEG formats. You do not need to use Microsoft Project or other project management software to load and view Project files within your .NET application (web or desktop).
To start using the GroupDocs.Viewer API, create a Viewer class instance. Pass a document you want to view to the class constructor. You can load the document from a file or stream. Call one of the Viewer.View method overloads to convert the document to HTML, PDF, or image format. These methods allow you to render the entire document or specific pages.
GroupDocs.Viewer supports the following Project Management file formats:
- Microsoft Project (.MPP)
- Microsoft Project Template (.MPT)
- Microsoft Project Exchange File (.MPX)
GroupDocs.Viewer can detect the document format automatically based on information in the file header.
NoteFamily of the Project Management file formats (MPP, MPT, and MPX) currently is not supported by the GroupDocs.Viewer.CrossPlatform.
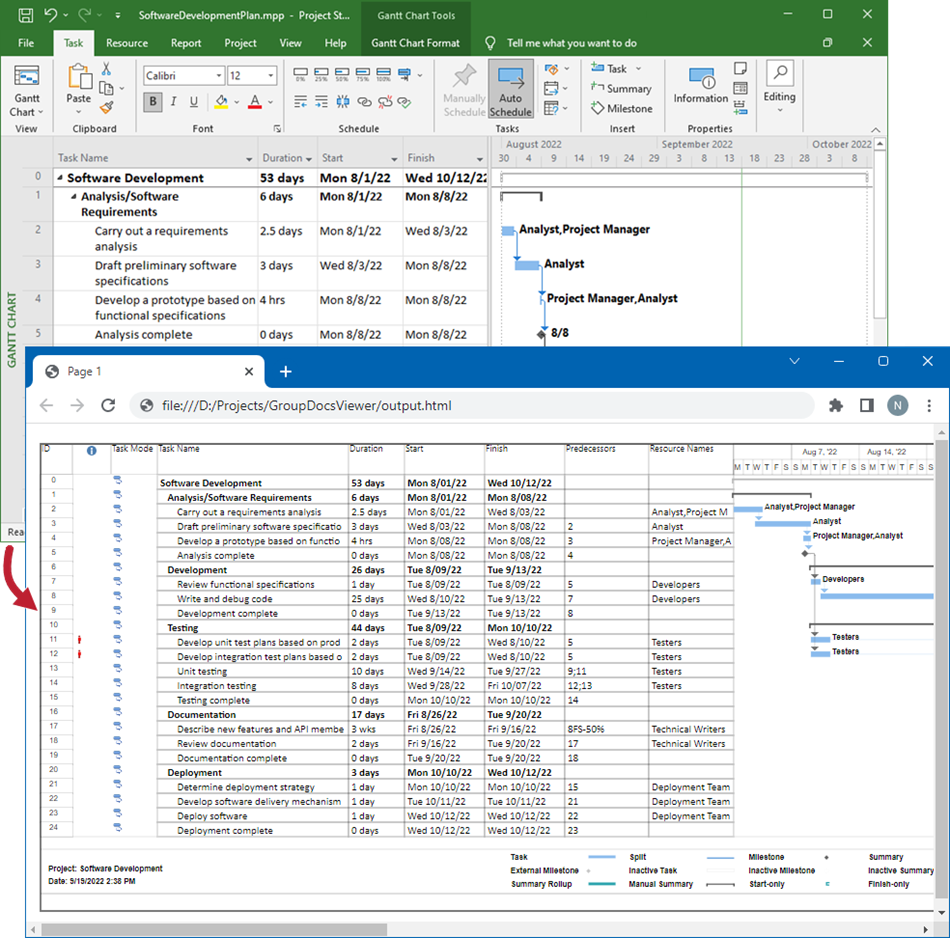
Create an HtmlViewOptions class instance and pass it to the Viewer.View method to convert a Project file to HTML. The HtmlViewOptions class properties allow you to control the conversion process. For instance, you can embed all external resources in the generated HTML file, minify the output file, and optimize it for printing. Refer to the following documentation section for details: Rendering to HTML.
To save all elements of an HTML page (including text, graphics, and stylesheets) into a single file, call the HtmlViewOptions.ForEmbeddedResources method and specify the output file name.
using GroupDocs.Viewer;
using GroupDocs.Viewer.Options;
// ...

using (var viewer = new Viewer("SoftwareDevelopmentPlan.mpp"))
{
    // Render the project's active view as HTML.
    // {0} is replaced with the current page number in the output file names.
    var viewOptions = HtmlViewOptions.ForEmbeddedResources("page_{0}.html");
    viewer.View(viewOptions);
}
Imports GroupDocs.Viewer
Imports GroupDocs.Viewer.Options
' ...

Module Program
    Sub Main(args As String())
        Using viewer = New Viewer("SoftwareDevelopmentPlan.mpp")
            ' Render the project's active view as HTML.
            ' {0} is replaced with the current page number in the output file names.
            Dim viewOptions = HtmlViewOptions.ForEmbeddedResources("page_{0}.html")
            viewer.View(viewOptions)
        End Using
    End Sub
End Module
The following image demonstrates the result:
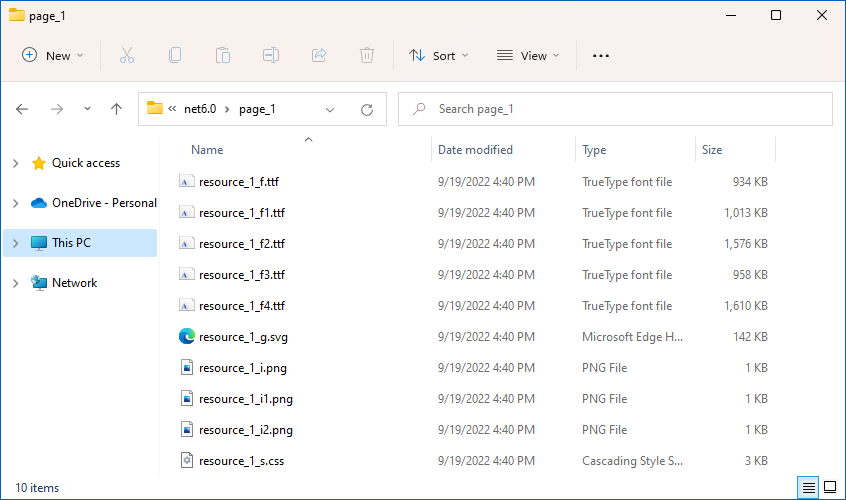
If you want to store an HTML file and additional resource files (such as fonts, images, and stylesheets) separately, call the HtmlViewOptions.ForExternalResources method and pass the following parameters:
- The output file path format
- The path format for the folder with external resources
- The resource URL format
using GroupDocs.Viewer;
using GroupDocs.Viewer.Options;
// ...

using (var viewer = new Viewer("SoftwareDevelopmentPlan.mpp"))
{
    // Render the project's active view as HTML.
    // Specify the HTML file names and location of external resources.
    // {0} and {1} are replaced with the page number and resource name, respectively.
    var viewOptions = HtmlViewOptions.ForExternalResources("page_{0}.html", "page_{0}/resource_{0}_{1}", "page_{0}/resource_{0}_{1}");
    viewer.View(viewOptions);
}
Imports GroupDocs.Viewer
Imports GroupDocs.Viewer.Options
' ...

Module Program
    Sub Main(args As String())
        Using viewer = New Viewer("SoftwareDevelopmentPlan.mpp")
            ' Render the project's active view as HTML.
            ' Specify the HTML file names and location of external resources.
            ' {0} and {1} are replaced with the page number and resource name, respectively.
            Dim viewOptions = HtmlViewOptions.ForExternalResources("page_{0}.html", "page_{0}/resource_{0}_{1}", "page_{0}/resource_{0}_{1}")
            viewer.View(viewOptions)
        End Using
    End Sub
End Module
The image below demonstrates the result. External resources are placed in a separate folder.
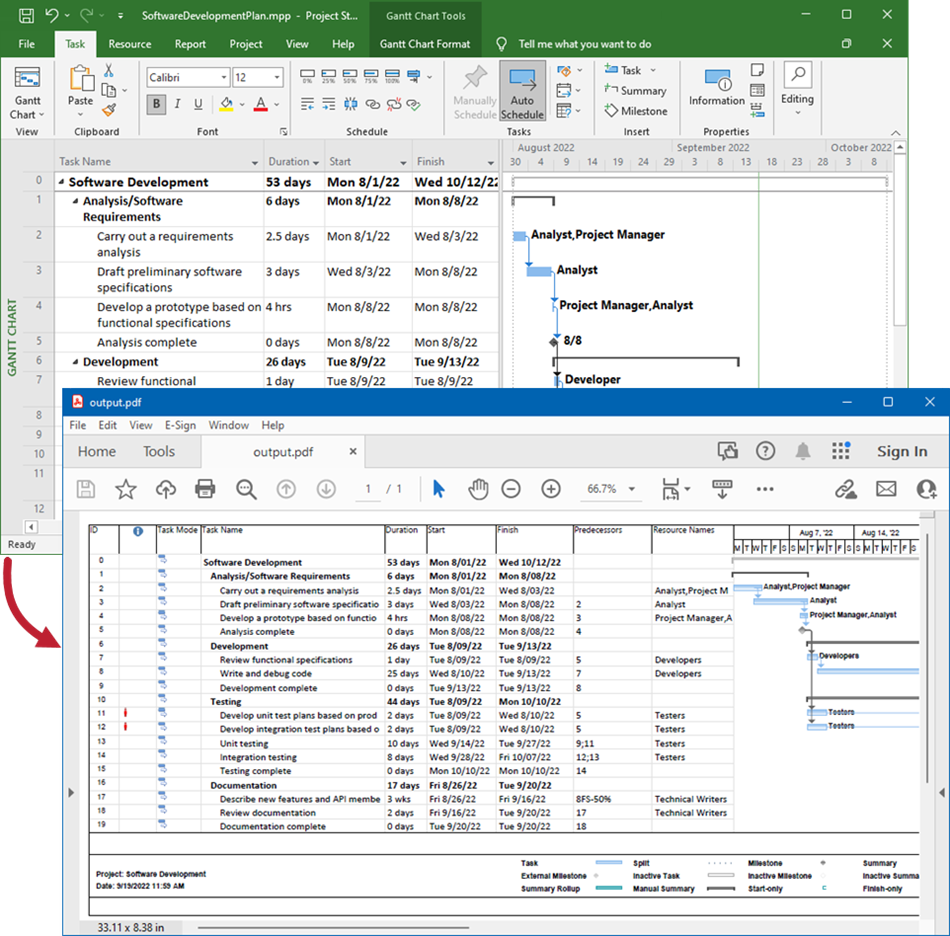
Create a PdfViewOptions class instance and pass it to the Viewer.View method to convert a Project file to PDF. The PdfViewOptions class properties allow you to control the conversion process. For instance, you can protect the output PDF file, reorder its pages, and specify the quality of document images. Refer to the following documentation section for details: Rendering to PDF.
using GroupDocs.Viewer;
using GroupDocs.Viewer.Options;
// ...

using (var viewer = new Viewer("SoftwareDevelopmentPlan.mpp"))
{
    // Create a PDF file for the project's active view.
    var viewOptions = new PdfViewOptions("output.pdf");
    viewer.View(viewOptions);
}
Imports GroupDocs.Viewer
Imports GroupDocs.Viewer.Options
' ...

Module Program
    Sub Main(args As String())
        Using viewer = New Viewer("SoftwareDevelopmentPlan.mpp")
            ' Create a PDF file for the project's active view.
            Dim viewOptions = New PdfViewOptions("output.pdf")
            viewer.View(viewOptions)
        End Using
    End Sub
End Module
The following image demonstrates the result:
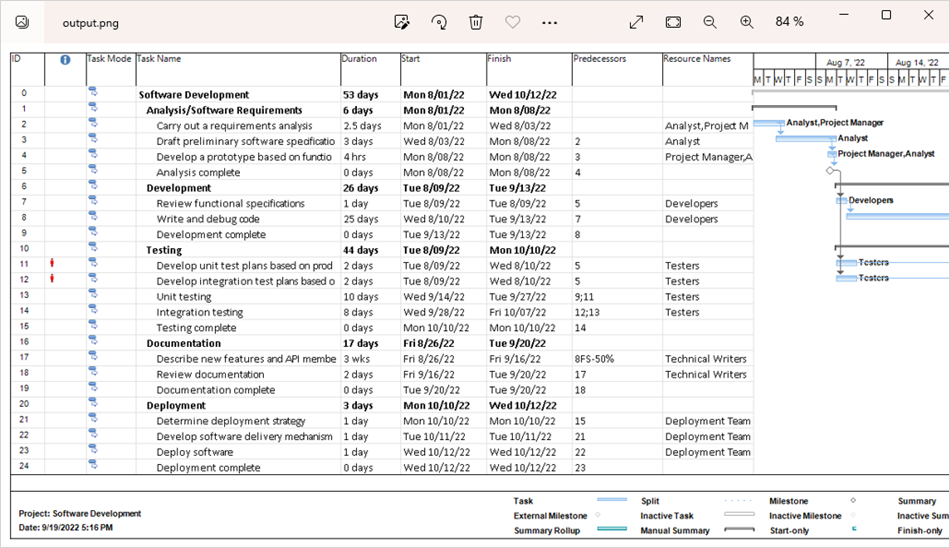
Create a PngViewOptions class instance and pass it to the Viewer.View method to convert a Project file to PNG. Use the PngViewOptions.Height and PngViewOptions.Width properties to specify the output image size in pixels.
using GroupDocs.Viewer;
using GroupDocs.Viewer.Options;
// ...

using (var viewer = new Viewer("SoftwareDevelopmentPlan.mpp"))
{
    // Render the project's active view as PNG.
    // {0} is replaced with the current page number in the output file names.
    var viewOptions = new PngViewOptions("output_{0}.png");
    // Set width and height.
    viewOptions.Width = 1600;
    viewOptions.Height = 650;
    viewer.View(viewOptions);
}
Imports GroupDocs.Viewer
Imports GroupDocs.Viewer.Options
' ...

Module Program
    Sub Main(args As String())
        Using viewer = New Viewer("SoftwareDevelopmentPlan.mpp")
            ' Render the project's active view as PNG.
            ' {0} is replaced with the current page number in the output file names.
            Dim viewOptions = New PngViewOptions("output_{0}.png")
            ' Set width and height.
            viewOptions.Width = 1600
            viewOptions.Height = 650
            viewer.View(viewOptions)
        End Using
    End Sub
End Module
The following image demonstrates the result:
Create a JpgViewOptions class instance and pass it to the Viewer.View method to convert a Project file to JPEG. Use the JpgViewOptions.Height and JpgViewOptions.Width properties to specify the output image size in pixels.
using GroupDocs.Viewer;
using GroupDocs.Viewer.Options;
// ...

using (var viewer = new Viewer("SoftwareDevelopmentPlan.mpp"))
{
    // Render the project's active view as JPEG.
    // {0} is replaced with the current page number in the output file names.
    var viewOptions = new JpgViewOptions("output_{0}.jpg");
    // Set width and height.
    viewOptions.Width = 1600;
    viewOptions.Height = 650;
    viewer.View(viewOptions);
}
Imports GroupDocs.Viewer
Imports GroupDocs.Viewer.Options
' ...

Module Program
    Sub Main(args As String())
        Using viewer = New Viewer("SoftwareDevelopmentPlan.mpp")
            ' Render the project's active view as JPEG.
            ' {0} is replaced with the current page number in the output file names.
            Dim viewOptions = New JpgViewOptions("output_{0}.jpg")
            ' Set width and height.
            viewOptions.Width = 1600
            viewOptions.Height = 650
            viewer.View(viewOptions)
        End Using
    End Sub
End Module
Follow the steps below to obtain information about a Project file (the file format, the number of pages, the project’s start and end dates):
- Create a ViewInfoOptions instance for a specific view.
- Call the Viewer.GetViewInfo method, pass the
ViewInfoOptionsinstance to this method as a parameter, and cast the returned object to the ProjectManagementViewInfo type. - Use the
ProjectManagementViewInfoclass properties to retrieve information about the Project file.
using GroupDocs.Viewer;
using GroupDocs.Viewer.Options;
using GroupDocs.Viewer.Results;
// ...

using (var viewer = new Viewer("SoftwareDevelopmentPlan.mpp"))
{
    var viewInfoOptions = ViewInfoOptions.ForHtmlView();
    var viewInfo = viewer.GetViewInfo(viewInfoOptions) as ProjectManagementViewInfo;

    if (viewInfo != null)
    {
        // Display information about the Project file.
        Console.WriteLine($"File type: {viewInfo.FileType}");
        Console.WriteLine($"The number of pages: {viewInfo.Pages.Count}");
        Console.WriteLine($"Project start date: {viewInfo.StartDate}");
        Console.WriteLine($"Project end date: {viewInfo.EndDate}");
    }
}
Imports GroupDocs.Viewer
Imports GroupDocs.Viewer.Options
Imports GroupDocs.Viewer.Results
' ...

Module Program
    Sub Main(args As String())
        Using viewer = New Viewer("SoftwareDevelopmentPlan.mpp")
            Dim viewInfoOptions = ViewInfoOptions.ForHtmlView()
            Dim viewInfo = TryCast(viewer.GetViewInfo(viewInfoOptions), ProjectManagementViewInfo)

            If viewInfo IsNot Nothing Then
                ' Display information about the Project file.
                Console.WriteLine($"File type: {viewInfo.FileType}")
                Console.WriteLine($"The number of pages: {viewInfo.Pages.Count}")
                Console.WriteLine($"Project start date: {viewInfo.StartDate}")
                Console.WriteLine($"Project end date: {viewInfo.EndDate}")
            End If
        End Using
    End Sub
End Module
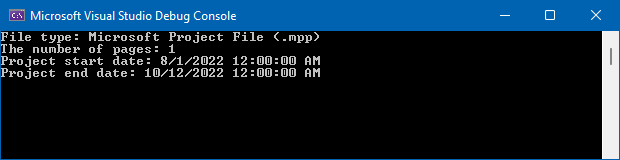
The following image shows a sample console output:
GroupDocs.Viewer allows you to specify page size for the output file when you convert your Project document to HTML, PDF, or image format. Assign a PageSize enumeration member to the ProjectManagementOptions.PageSize property to select one of the predefined page sizes (Letter, Ledger, A0, A1, A2, A3, or A4). You can access this property for the following classes (depending on the output file format):
The following example specifies page size for the output PDF file:
using GroupDocs.Viewer;
using GroupDocs.Viewer.Options;
// ...

using (var viewer = new Viewer("SoftwareDevelopmentPlan.mpp"))
{
    // Convert the document to PDF.
    var viewOptions = new PdfViewOptions("output.pdf");
    // Specify the page size.
    viewOptions.ProjectManagementOptions.PageSize = PageSize.A3;
    viewer.View(viewOptions);
}
Imports GroupDocs.Viewer
Imports GroupDocs.Viewer.Options
' ...

Module Program
    Sub Main(args As String())
        Using viewer = New Viewer("SoftwareDevelopmentPlan.mpp")
            ' Convert the document to PDF.
            Dim viewOptions = New PdfViewOptions("output.pdf")
            ' Specify the page size.
            viewOptions.ProjectManagementOptions.PageSize = PageSize.A3
            viewer.View(viewOptions)
        End Using
    End Sub
End Module
When rendering a Project file, GroupDocs.Viewer selects the smallest time unit on a timescale based on the total length of the project. You can adjust the timescale to show smaller or greater time units (from days to months). To do this, set the ViewOptions.ProjectManagementOptions.TimeUnit property for a target view to one of the following TimeUnit enumeration members:
Daysdisplays days on the timescale.ThirdsOfMonthsdisplays the Beginning/Middle/End (B/M/E) of each month on the timescale.Monthsdisplays months on the timescale.Unspecifiedmeans that the timescale unit is not specified.
The following code sample demonstrates how to specify the timescale unit when rendering a Project file to HTML:
using GroupDocs.Viewer;
using GroupDocs.Viewer.Options;
// ...

using (var viewer = new Viewer("SoftwareDevelopmentPlan.mpp"))
{
    // Convert the document to HTML.
    // {0} is replaced with the current page number in the file name.
    var viewOptions = HtmlViewOptions.ForEmbeddedResources("output_{0}.html");
    // Specify the time unit.
    viewOptions.ProjectManagementOptions.TimeUnit = TimeUnit.ThirdsOfMonths;
    viewer.View(viewOptions);
}
Imports GroupDocs.Viewer
Imports GroupDocs.Viewer.Options
' ...

Module Program
    Sub Main(args As String())
        Using viewer = New Viewer("SoftwareDevelopmentPlan.mpp")
            ' Convert the document to HTML.
            ' {0} is replaced with the current page number in the file name.
            Dim viewOptions = HtmlViewOptions.ForEmbeddedResources("output_{0}.html")
            ' Specify the time unit.
            viewOptions.ProjectManagementOptions.TimeUnit = TimeUnit.ThirdsOfMonths
            viewer.View(viewOptions)
        End Using
    End Sub
End Module
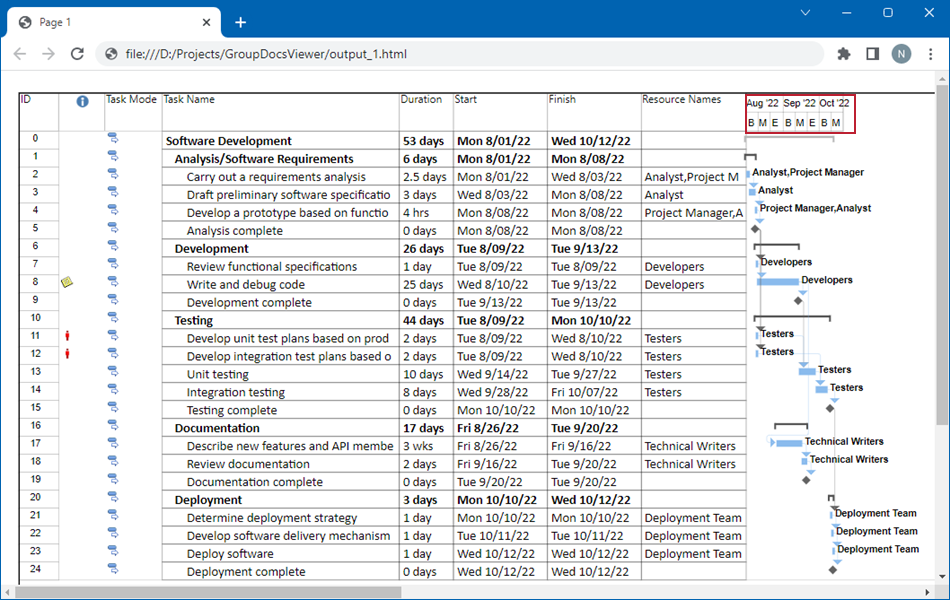
The image below illustrates the result.
With GroupDocs.Viewer, you can render only a portion of the project’s timeline when you convert your Project file to HTML, PDF, or image format. Set the ViewOptions.ProjectManagementOptions.StartDate and ViewOptions.ProjectManagementOptions.EndDate properties for a target view to specify a date range the timeline should display. If you set only the StartDate property, the timeline displays information for tasks from the specified date to the project’s finish date. If you set only the EndDate property, the timeline contains dates from the project’s start date to the specified date.
The example below demonstrates how to convert a Project file to PDF and set the timeline date range.
using System;
using GroupDocs.Viewer;
using GroupDocs.Viewer.Options;
// ...

using (var viewer = new Viewer("SoftwareDevelopmentPlan.mpp"))
{
    // Convert the document to PDF.
    var viewOptions = new PdfViewOptions("output.pdf");
    // Specify the date range.
    viewOptions.ProjectManagementOptions.StartDate = new DateTime(2022, 08, 01);
    viewOptions.ProjectManagementOptions.EndDate = new DateTime(2022, 09, 01);
    viewer.View(viewOptions);
}
Imports System
Imports GroupDocs.Viewer
Imports GroupDocs.Viewer.Options
' ...

Module Program
    Sub Main(args As String())
        Using viewer = New Viewer("SoftwareDevelopmentPlan.mpp")
            ' Convert the document to PDF.
            Dim viewOptions = New PdfViewOptions("output.pdf")
            ' Specify the date range.
            viewOptions.ProjectManagementOptions.StartDate = New DateTime(2022, 08, 01)
            viewOptions.ProjectManagementOptions.EndDate = New DateTime(2022, 09, 01)
            viewer.View(viewOptions)
        End Using
    End Sub
End Module
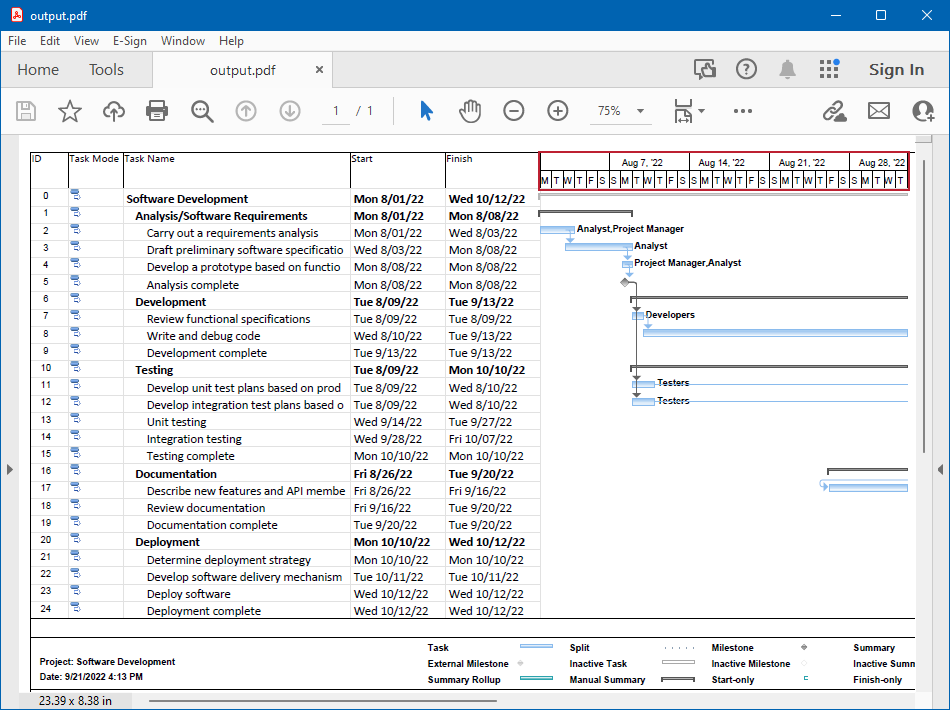
The following image illustrates the result:
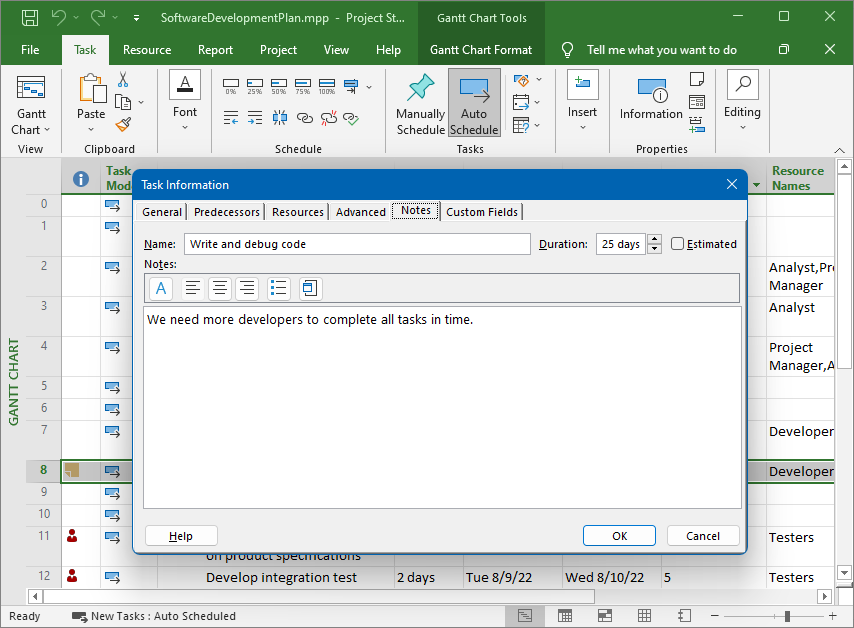
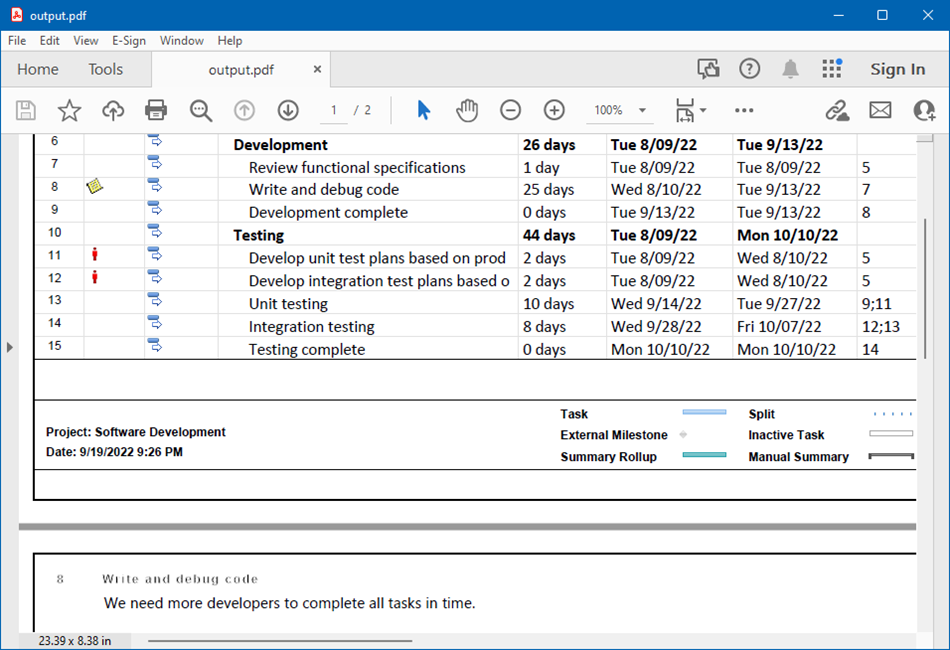
Microsoft Project allows you to add notes to tasks, resources, and assignments.
If you need to display these notes in the output HTML, PDF, or image files, enable the ViewOptions.RenderNotes property for a target view.
The following code sample converts a Project file with task notes to PDF:
using GroupDocs.Viewer;
using GroupDocs.Viewer.Options;
// ...

using (var viewer = new Viewer("SoftwareDevelopmentPlan.mpp"))
{
    // Convert the document to PDF.
    var viewOptions = new PdfViewOptions("output.pdf");
    // Enable notes rendering.
    viewOptions.RenderNotes = true;
    viewer.View(viewOptions);
}
Imports GroupDocs.Viewer
Imports GroupDocs.Viewer.Options
' ...

Module Program
    Sub Main(args As String())
        Using viewer = New Viewer("SoftwareDevelopmentPlan.mpp")
            ' Convert the document to PDF.
            Dim viewOptions = New PdfViewOptions("output.pdf")
            ' Enable notes rendering.
            viewOptions.RenderNotes = True
            viewer.View(viewOptions)
        End Using
    End Sub
End Module
The image below demonstrates the result. Notes are rendered on a separate page.
Was this page helpful?
Any additional feedback you'd like to share with us?
Please tell us how we can improve this page.
Thank you for your feedback!
We value your opinion. Your feedback will help us improve our documentation.

